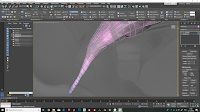
Retopping the facial hair
With objects like the moustache, I often had to go back and add in swift loops to better get the shape. It also took less time using swift loops than manually using step build, and it resulted in cleaner and less distorted polygons and loops.
Conforming to the shape of the high poly model
I used a similar method for the pieces of hair. It was crucial that I obtained the correct level of shape detail and so I had to utilise swift loop a lot more frequently. Despite this, my objects maintained an appropriate number of polys and as it was a high poly project anyway, having a few extra loops did not matter. I wanted the object to have the best appearance possible after baking.
Hair retopping
I resolved the ngon underneath the model by adding some simple connected verts. Throughout the retopping process, I ensured that I went back to check my work, as often there were times that I had incorrectly used step build, or when the rest of the head was showing I could see gaps in the areas of hair that I thought did not need to be filled.
This process taught me how to be patient and to not be afraid of retrying an area, as well as being thorough when looking over my progress.
Finished retop


No comments:
Post a Comment