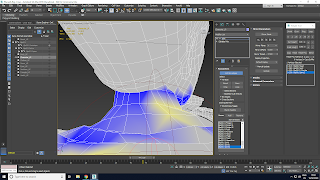
Rigging started with the checklist supplied by my tutors. I ensured that I had reset the Xform, centred the model and later applied the correct materials to the correct UV sheets. I then brought in the biped, which I centred to the model and the grid.
I created enough bones for the fingers to function, and one large toe bone as the sandal would move all the toes together when walking. As I went, I created test animations to look for deformations, especially within the joints.
I found that the elbows creased correctly after weighting. I found the weighting aspect difficult as I often found myself going over parts I had just weighted, but using the weighting table I was able to work much faster.
For the centerline of the long skirt, I made a falloff section that weighted to both legs. The skirt area was the most difficult to weight correctly, and I will go back and edit it soon as I would like to improve it. However, this rigging process helped me to determine whether or not I needed to attach certain items to the body, such as the Usekh collar and the necklace. I was worried that they would clip into each other, but I am satisfied that the rigging process works with these objects being seperate when they are weighted properly.
I ecported my high poly and low poly meshes into substance painter in order to do a test bake. If the AO was off I might have had to attach the objects anyway, but I was very pleased to see that the bake worked perfectly. I could not see any errors, and it also retained a good level of detail.


No comments:
Post a Comment