Wednesday, January 22, 2020

Digital Reflection 24 - Iterating and developing the prop

For the prop, I decided to create the Pharaoh's Crook and Flail. This displays his dominance and authority over the upper and lower kingdoms of egypt, as well as his allegiance and deidication to the god Osiris.

I started by gathering reference of existing archeological artefact crook and flails, and annotated them to pull apart what I liked about them. I drew some silhouettes to experiment with shape, and once I chose my three favourites I created a series of detailed sketches for them. Like with the character, I ended up combining some of the sketches to get a final design that I was satisfied with.


I then created value studies and colour variations, once again using photobashed materials to suit the realistic aesthetic our team was going for.


Finally, I created orthos of the crook and flail, and used a context of the pharaoh holding them to indicate size.


Digital Reflection 23 - Iteration and development process for the character

I started iterating the character using my moodboard for reference and silhouette drawings. I wanted the Pharaoh to look regal and different from the guards and the stereotypical pharaoh figure. To do this, I was going to use historically accurate references for crowns, clothing and jewellery.


I played with different types of silhouette, such as wide, slender and tapered clothing. I chose my three favourites, which had a lot of variety from each other, and developed them using more detailed sketches. This allowed me to place jewellery and patterns on the pharaoh to see what combinations worked best.


I then took some favourites of my sketches and developed them further, by combining elements from a few and creating a final detailed sketch from this. I also did a value pass to help me further develop the clothing.


Then I created some sketches of the pharaoh's face. I used reference images of facial reconstructions of ancient Egyptian mummies to create a more accurate apearance of ethnicity and face shape. I also experimented with skin tones and hair styles, choosing a dark/midtone skin colour and a shaven head, as from further research I found that Pharaohs were often bald to symbolise their coming of age.  Even though the top of the Pharaoh's head will not be visible in the game, I had experimented with wig styles and braids. This experimentation will make the character concept more complete.


The next stage was to gather more reference for the details of the pharaoh's clothing, such as the colours used, the pleated skirt, the use of gold and jewels and materials. I used references from photos at the Tutunkhamun exhibition that I visited in London, as well as photos from the internet that showed artefacts from tombs. I then used photobashing and altered them appropriately to make the source material into my own, and blended the photobashed materials using painting. I was pleased with the final photobash as I thought it displayed enough detail for a 3D artist to model from.


I used selective colouring in photoshop to choose apporpriate colours for the pharaoh. The main colours I wanted to show were gold, Lapis blue and red. These are colours associated with royalty in Ancient Egypt. I therefore chose different variations of these shades, adding more reds, greens or yellows to the tones when experimenting. I was happy with the colour combinations I chose as it displayed the wealth of the Pharaoh and was visually appealing.

3D Reflection 21 - Importing issues

As I made my level seperately first, I had issues with importing all o my work and build data into the group Unreal level on Perforce. Simply copying the work did not fix the issue and so I had to go into my Unreal level, select everything and migrate it over. However, to do this I needed to first bring in all my assets to the group file. I then moved my level over to the group level using perforce, and migrated the assets and build data to my assigned space in the group level.

This fixed the problem, and only small issues were encountered after that, such as renaming the level, having it not appear at first and then refreshing perforce to finally fix the issue. 


Finally my level was visible to everyone else in the group, and I was able to align my rooms up with the rest of the team. The next problem to solve will be the importing of the unwrapped and lightmapped assets, hopefully using the same build data as my current level.


3D Reflection 20 - Making a statue for the L shaped tomb room

I made one of the final props for my rooms, which was a statue of Osiris. I wanted Osiris to be the main god that my pharaoh was dedicated to: God of the Underworld and resurrection. I started by gathering reference images of statues of Osiris in Pureref, and opened Zbrush and began blocking out eh basic shape. The shape, although humanoid, features proportions typical of Ancient Egyptian art from the 18th dynasty, such as angular hands, a compacted face and a narrow silhouette.


I found the face difficult to model as it needed to resemble a carved piece of rock, and so it did not need seperate eyeballs. However, making the proportions similar to the source material was the hardest issue as the sizing and shapes were unusual.


I modelled the beard by masking and extruding out a section of the chin to create a subtool.


Once the main shapes were in place, I went over them with the clay modelling tool and trim dynamic to crete the finer details, such as the crook and flail, the engraved lines on the crown and the plaits of the beard. I also made  some jewellery details using my reference and a subtractive brush in Zbrush. most of the detail now will go into the texturing to create the effect of cracked stone and paint.


Saturday, January 11, 2020

Digital Reflection 22 - Starting the Game Style Guide Project

To begin the new project, I started by filling out the project premise sheet for the character and the game concept. I decided to base it off of my group project in 3D so that I could use elements of both in my work to make my concepts stronger. It would also help to support my 3D project, even though they will both be marked seperately. The concept is of an 18th dynasty ancient egyptian messenger who is delivering a late message to the pharaoh whilst the city is being attacked by foreign enemies. The game style is a linear action adventure style game with dungeon crawler elements, and the player plays as the messenger. You can choose to avoid or confront enemies but battle skills are limited as they are not a soldier. The final NPC you meet is the pharaoh, who I will be designing as my character. 


3D Reflection 19 - Using Unreal to make the Main room, L room and Corridor

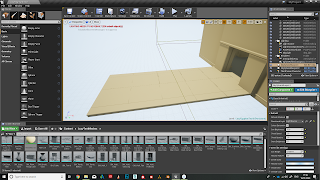
I reimported all of my edited assets into my unreal file, but most items had changed so much that I decided to restart the level. This time it was much faster as I knew the plan of the level and everything clicked a lot more smoothly.

I dressed the L room with tombs and urns, reusing my vase assets and resizing them. I also placed in loose bricks and canopic chests.


I then worked on the corridor room, using existing assets in different ways, such as the ceiling trim with a slim set of ceiling lattices, and rows of decorative tables along the walls. I also made sure to add the loose bricks and rotate the columns so that they were at different angles.


For extra detail I placed the loose bricks around the entire area to show damage.


I also fixed the collisions on the doors temporarily by creating simple box collisions.


This was the layout from the top. The next stage will be to review my progress with my tutors and teammates, and to unwrap and lightmap the models. Hopefully I will be able to reimport unwrapped models without the Unreal level getting ruined.


3D Reflection 18 - Resizing and Rebuilding some assets

I wanted to remake some of my assets and adjust the sizes of others as I was not satisfied with them. Some of them had slightly incorrect measurements and pivots, and so they did not click correctly in Unreal using the grid snap tool, which is crucial for my wall and floor modular kits. Therefore I meticulously went through  every single asset that I had constructed, and edited them accordingly. I used the coordinates at the bottom and the transform toolbox, as well as the assets that were already accurate as a reference. 

Remaking and resizing my assets.


I deleted the tops and bottoms of assets that would not be visible in the level.


I constantly checked to see if my assets snapped together whist editing them. I was a lot more succesful this time.


Some assets, like the curved ceiling pieces for the L room needed to be completely reconstructed as they were the wrong size and did not click together.


I also started work on some of my assets for the L room, the tombs. I made a pristine tomb and a broken one, creating a seperate lid that could be placed around at different angles, or the tomb could be left lidless.


I created an Ancient Egyptian style canopic chest, which would be found in the tombs of both royal and regular people. 


I made a large brick that could be placed underneath the broken pillars to show damage in a battle and lack of maintenance in the poorer parts of the palace on the outskirts. These could also be used as a sticking out object as well as debris.


Another asset I needed to make was the tree. I started by producing a spline similar to the example tree I used, but I made it slightly straighter as is common with Egyptian palms. I then used the extrude tool to create the trunk, and tapered it towards the top, before extruding a loop outwards to create the bulbous shape near the leaves at the top of the palm. Top complete the model I will need to make alphas of the leaves. I will do this for two other plants also.